DIY or Professional? Navigating Your Switch Installation Choices
Introduction: Understanding Switch Installation
Switch installation might seem like a straightforward task, but there’s a bit more to it than just flipping a switch. Whether you’re thinking about updating a light switch, installing a dimmer, or even putting in a smart switch to give your home a modern touch, the process involves understanding wiring, electrical safety, and the tools needed for the job. Deciding between DIY or hiring a professional comes down to your comfort level with electrical work, the complexity of the switch you’re installing, and the time you’re willing to invest. While some may find the challenge manageable and satisfying, others might prefer the reassurance and expertise of a professional electrician. It’s not just about saving money on installation costs; it’s about ensuring the job is done safely and correctly. Remember, messing with electrical systems can be dangerous if you’re not fully clued up. So, before diving into this project, let’s weigh the options and talk about what to expect from the process of switch installation, keeping in mind both safety and efficiency.
The Basics of Switch Installation
When it comes to installing a switch, knowing the basics will help you decide whether to go DIY or call in a professional. First off, understand that switches control the flow of electricity in your home, toggling power to lights and appliances. Switch installation involves several steps: turning off the power at the circuit breaker to ensure safety, removing the old switch (if replacing), connecting the new switch to the electrical wires, and securing it back into the wall. Sounds simple, right? But here’s the kicker – dealing with electricity requires caution and precision. Mistakes can lead to electrical fires or shocks. DIY is fine if you have experience with electrical systems and can follow safety guidelines. If not, hiring a professional is the safer bet. They have the tools, knowledge, and experience to get the job done right and safely.
DIY Switch Installation: Advantages and Considerations
Taking on switch installation by yourself can be a rewarding project. It’s a great way to get familiar with your home’s electrical system, and you could save money on labor costs. However, it’s not all smooth sailing. First up, the potential savings. Buying just the switch and skipping the professional fees can keep your wallet happy. You’re looking at the cost of parts only, which means your total spend is usually lower. Plus, there’s the satisfaction of doing it yourself. Completing a project on your own can boost your confidence and give you valuable skills for future home repairs.
But, it’s wise to consider the flip side. Electrical work isn’t a walk in the park. You need a good grasp of wiring and safety protocols to avoid shocks or worse, starting a fire. Also, a botched job could mean calling in a professional anyway, doubling the trouble and the cost. Your DIY work won’t come with a guarantee. If something goes wrong, it’s on you to fix it or pay someone who can.
In short, diving into DIY switch installation can be cost-effective and enriching, provided you’re up for the challenge and fully aware of the risks. Getting it right requires preparation, respect for safety, and a willingness to learn. If that sounds like you, it might just be the project you’re looking for.
Tools and Materials Needed for DIY Installation
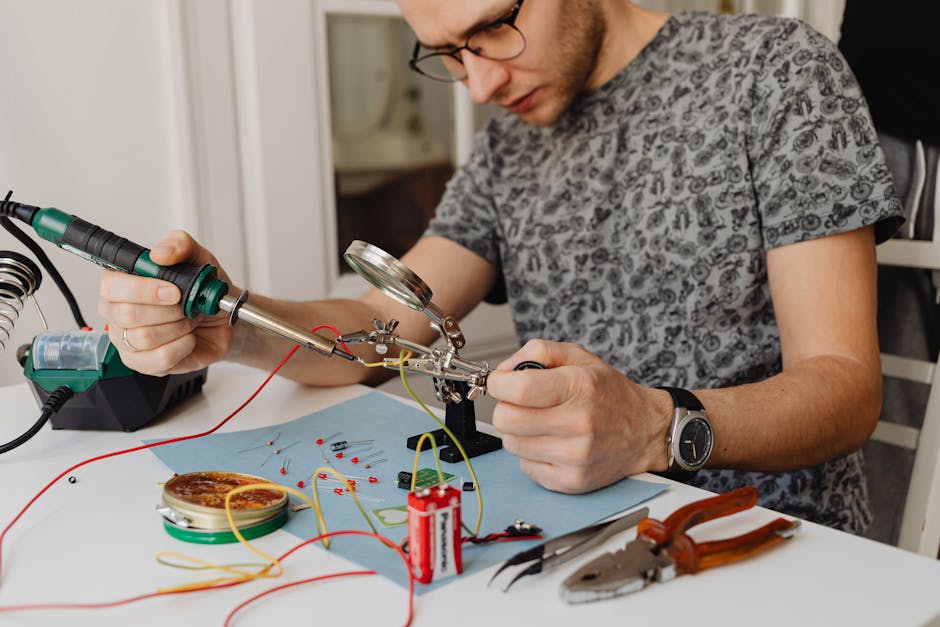
For a DIY switch installation, you want to dive in equipped. Here’s the kit you’ll need: a screwdriver, preferably both flathead and Philips, wire strippers, a voltage tester, and needle-nose pliers. Materials wise, make sure you’ve got the new switch, wire nuts, and electrical tape. Safety first, so don’t skimp on a good pair of insulated gloves and safety goggles. This isn’t an exhaustive list, but it’s your starting point. Remember, every DIY adventure varies slightly, so if your switch comes with a unique set of instructions or requires specific tools, follow that lead. Now, gather your gear and let’s get to work.
Step-by-Step Guide to DIY Switch Installation
Legal Disclaimer: This guide is provided for general informational purposes only and should not be construed as professional advice. Electrical work can be hazardous and should only be performed by individuals who have adequate training and experience. The instructions provided here are simplified and may not cover all the necessary precautions or steps required for safe and proper installation. We strongly recommend consulting with or hiring a licensed electrician for any electrical work to ensure safety and compliance with all local codes and regulations. Failure to follow appropriate safety guidelines can result in serious injury or death. The authors and publishers of this guide disclaim any liability for any loss or damage resulting from the use of the information contained herein.
First off, power down your circuit breaker. If you've noticed we've repeated this part now several times. Safety first. Now, remove the old switch cover with a screwdriver and use your meter to check that power is off and not running through the circuit. On a switch, you do this by touching your black probe to the ground screw and your red probe to one of the screws that has a black wire attached; carefully check between the two making sure you're getting a reading of zero (0.00V). THEN carefully pull the switch out of the box. You'll see wires. Take note, on older analog switches (not modern smart switches), the only wires attached to the switch are two black wires(switch leg—usually top screw / always hot—usually bottom screw), and a ground wire—usually green or bare.
Loosen the screws holding the wires on the old switch in the following fashion:
- Loosen the screws holding the Switch Leg—usually top screw; Bend the black wire up out of the way
- Loosen the screws holding the Always Hot—usually bottom screw; bend the black wire down out of the way.
- The last part of removing your old switch is to Loosen the screws holding the Ground Wire—usually green or bare; bend the green or bare wire to the side and out of the way.
- In a switch box, all of your neutral white wires should be secured together with a wire nut and not attached to any of the switches unless a white wire has been unidentified. Modern switches are now using the white wire on the switch itself as well; in both these cases, we would recommend calling a professional.
- If step four doesn't apply to you, Take your new switch, and attach the Ground Wire—usually green or bare to the green screw.
- Attach the Always Hot wire from step two to the bottom screw.
- Attach the Switch Leg wire from step one to the top screw.
- If you have any trouble during any of these steps please reach out to a professional for help, making a mistake here is easy to do and can cause a lot of trouble otherwise avoided by having a licensed electrician take care of it.
- If your wires are all connected now, Push the switch back into the box, screw it in place, and pop the cover on.
- Flip the breaker back on. Test it. Congrats—you've installed a new light switch. If anything feels off or the lights don't work right, turn the power off and check your connections. Still not right? It might be time to call in a pro.
Finally, test the switch. If everything’s working correctly, you’ve just installed a switch! Congrats on the DIY win. Remember, if anything seems off or you’re unsure at any step, don’t hesitate to call in a pro. Better safe than sorry.
When to Consider Professional Switch Installation
Thinking about changing switches yourself might save you money, but there are moments when calling in a pro is the smarter choice. First off, if the wiring in your house is old or not up to the latest safety codes, a professional electrician can update it safely. Also, if you’re unsure about the type of switch you need, consulting with a professional can ensure you get the right one for your specific needs, like dimmers or timers. Complex installations, like those needing special configurations or smart switches that integrate with home automation systems, definitely call for professional skills. Lastly, any job that feels out of your comfort zone in terms of safety should be handed off to an expert. Remember, messing with electrical systems can be dangerous. When in doubt, it’s worth the cost to ensure it’s done right and safely.
Comparing Costs: DIY vs. Professional Installation
When you’re looking at switching out a light switch or any kind of switch in your home, you’ll stumble upon two paths: doing it yourself (DIY) or calling in a professional. Let’s break down the costs to help you make an informed decision. DIY can seem cheaper at first glance. If you have the tools and a bit of know-how, you might only spend on the switch itself, which can range from $5 to $50 depending on the type and quality. But, there’s a catch. If things go south, you might end up spending more on fixing mistakes. On the flip side, hiring a professional ensures the job is done right the first time. Costs for professional installation vary widely by location and complexity of the job but expect to shell out anywhere from $100 to $200 for labor alone. This doesn’t include the cost of the switch. So, while the initial outlay for a professional might seem high, it could save you from future headaches and additional costs. Bottom line? Weigh your comfort with electrical work against the potential for extra costs due to mistakes. Sometimes, spending a bit more upfront with a professional can be the cheaper route in the long run.
Common Mistakes to Avoid in Switch Installation
When you’re thinking of adding or replacing a switch in your house, it’s tempting to do it yourself. But, whether you’re a seasoned DIYer or thinking of trying it for the first time, there are pitfalls you need to steer clear of. First off, don’t ignore the importance of turning off the power. It’s job number one for a reason. Skipping this can lead to serious accidents. Next, people often mix up the wires or connect them loosely. It’s not just about connecting wires; it’s about making sure they’re secure and in the right place. Another common mistake is choosing the wrong switch type. Not all switches are the same. You’ve got to match the switch to the job it needs to do. Also, don’t forget about the grounding wire. It’s an easy step to overlook, but it’s crucial for safety. Lastly, fitting everything back into the box can be tricky. If you force it, you might damage the wires or the switch. So there you have it, mistakes to avoid. Keep them in mind, and you’re on your way to a successful switch installation, whether you go DIY or professional.
Safety Tips for Switch Installation
Switch installation, whether you’re going DIY or hiring a pro, always starts with safety first. Before you even touch a wire, make sure the power is off. Head to your home’s breaker box, find the right switch, and flip it to the OFF position. It’s better to be overly cautious here. Next, use a voltage tester on the switch before you start work. This ensures the electricity is really off, keeping you safe from shocks. Always wear protective gear like gloves and safety glasses, because accidents can happen even in the safest conditions. If you’re not 100% sure about what you’re doing, it’s time to call in a pro. Remember, water and electricity are a dangerous mix, so keep your work area dry. Stick to these safety tips, and you’re on your way to a successful switch installation.
Conclusion: Making the Right Choice for Your Home
Deciding between a DIY or hiring a professional for your switch installation boils down to a few key points. If you’re confident in your skills, have the right tools, and understand the safety risks, going DIY could save you money. But, if you’re unsure, remember that professionals bring experience, efficiency, and peace of mind. They know the ins and outs, ensuring the job’s done right the first time, avoiding any future issues or extra costs. Think about what’s best for your home and your ability to handle the task. After all, ensuring your home’s electrical work is safe and reliable is a top priority.


